How to Design a Tattoo: From Idea to Artist Brief
Learn how to design a tattoo, from choosing a subject and collecting references to planning placement, refining a concept, and briefing your tattoo artist.
To design a tattoo, choose a main subject, collect references, decide on a style and body placement, then develop and review a rough composition. Bring that concept to a tattoo artist who can adapt the drawing, detail, and scale for your body.
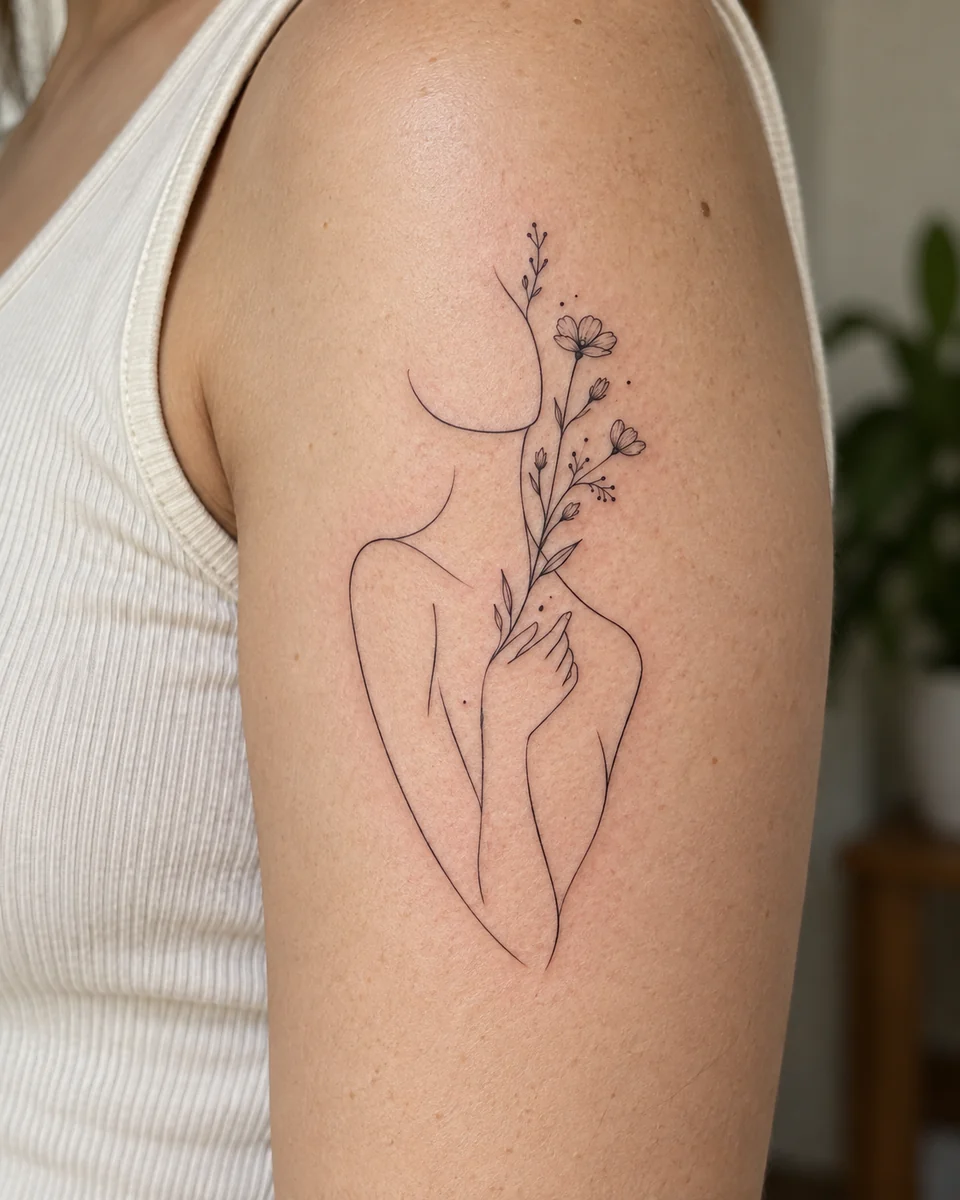
You can start with a pencil sketch, a written brief, or an AI concept. You don't need a polished illustration before contacting an artist. This guide follows a fine-line figure holding flowers from an initial idea to a clear brief you could take to a consultation.
1. Choose the main idea for your tattoo
Write one sentence describing what you want to see. A memory or personal meaning can guide that choice, but liking the appearance of a subject is enough to start.
For our example, the sentence is: "An upper-body figure holding a tall flowering stem, drawn with simple black lines."
That gives the design a recognizable subject and a relationship between its parts. "Flowers, a face, stars, a date, and something about growth" leaves more decisions unresolved. If several ideas matter, choose which one should lead and which could become separate tattoos.
Divide your notes into three groups:
- Essential: A person holding a flowering stem; black linework.
- Flexible: The flower species, pose, and number of blooms.
- Leave out: Lettering, decorative borders, and a background scene.
Keep this list short. It gives you a way to compare sketches later without treating every incidental detail in the first image as a requirement.
2. Gather tattoo references and choose a style
Collect references that answer different questions. A flower photograph can show the petal shape. An illustration can show the pose. Work from an artist's portfolio can help you describe the kind of lines or shading you prefer.
Add a note to each reference: "the open space between leaves," "the curve of the arm," or "the contrast between the subject and background." This is more useful than sending a folder of images and expecting someone else to guess what connects them.
Use existing tattoos to explain the features you like. Ask your artist to develop an original composition from those preferences instead of copying the reference.
Describe style through visible choices:
| Decision | What to compare in your references |
|---|---|
| Linework | Fine contours, heavier outlines, or a mix |
| Shading | Open areas, soft shading, dots, or solid black |
| Color | Black only, a limited palette, or multiple colors |
| Detail | Simplified shapes or more descriptive features |
For the figure-and-flowers example, the direction is fine line: a simplified face, sparse botanical details, and open space. Save examples of an artist's own work that match those preferences. A style name alone leaves room for very different interpretations.
3. Plan your tattoo placement and size
Choose a likely body area before polishing the drawing. A design that reads well as a flat rectangle may wrap or disappear around a limb. Consider which parts should remain visible from the main viewing angle and which could extend around the sides.
For this example, the outer upper arm is a proposed placement. The tall stem suggests a vertical arrangement, but its width and the figure's position still need checking on the person who will wear it.
Note the approximate area you want the tattoo to occupy. If you have a preferred height and width, record them as a starting point for discussion. Also mention nearby tattoos and whether you hope to add more around it later.
Ask your artist which details need more room, which could be simplified, and how the composition should turn with your body. There is no universal centimeter measurement that makes every fine-line design work.
4. Sketch the composition before adding detail
Start with the largest shapes. You can use a circle for the head, a curved line for the shoulders, and a long stroke for the stem. At this stage, decide where the parts go; petals and facial details can wait.
Make a few small sketches with different arrangements. Try the stem closer to the figure, then farther away. Change the bend of the arm. Compare whether you can still tell that the person is holding the flowers.
Tattoo Smart's composition checklist discusses visual hierarchy, silhouette, contrast, and confusing connections between shapes. It also notes that these illustrative principles suit some tattoo styles more than others.
For our linework example, use those ideas to ask three practical questions:
- Does the figure-and-stem relationship read before the smaller flowers?
- Are the hand, stem, and surrounding lines distinct enough to follow?
- Is there open space between blooms, leaves, and the figure?
If you cannot draw the pose, write the intended connection beside a rough shape. "Hand grips stem here" gives an artist more direction than repeatedly trying to perfect the fingers yourself.
5. Use AI to explore a concept, if helpful
If you struggle to picture your idea, an AI tattoo generator can help you explore a visual direction. You can also take your written notes and rough sketches straight to an artist. An AI image is optional.
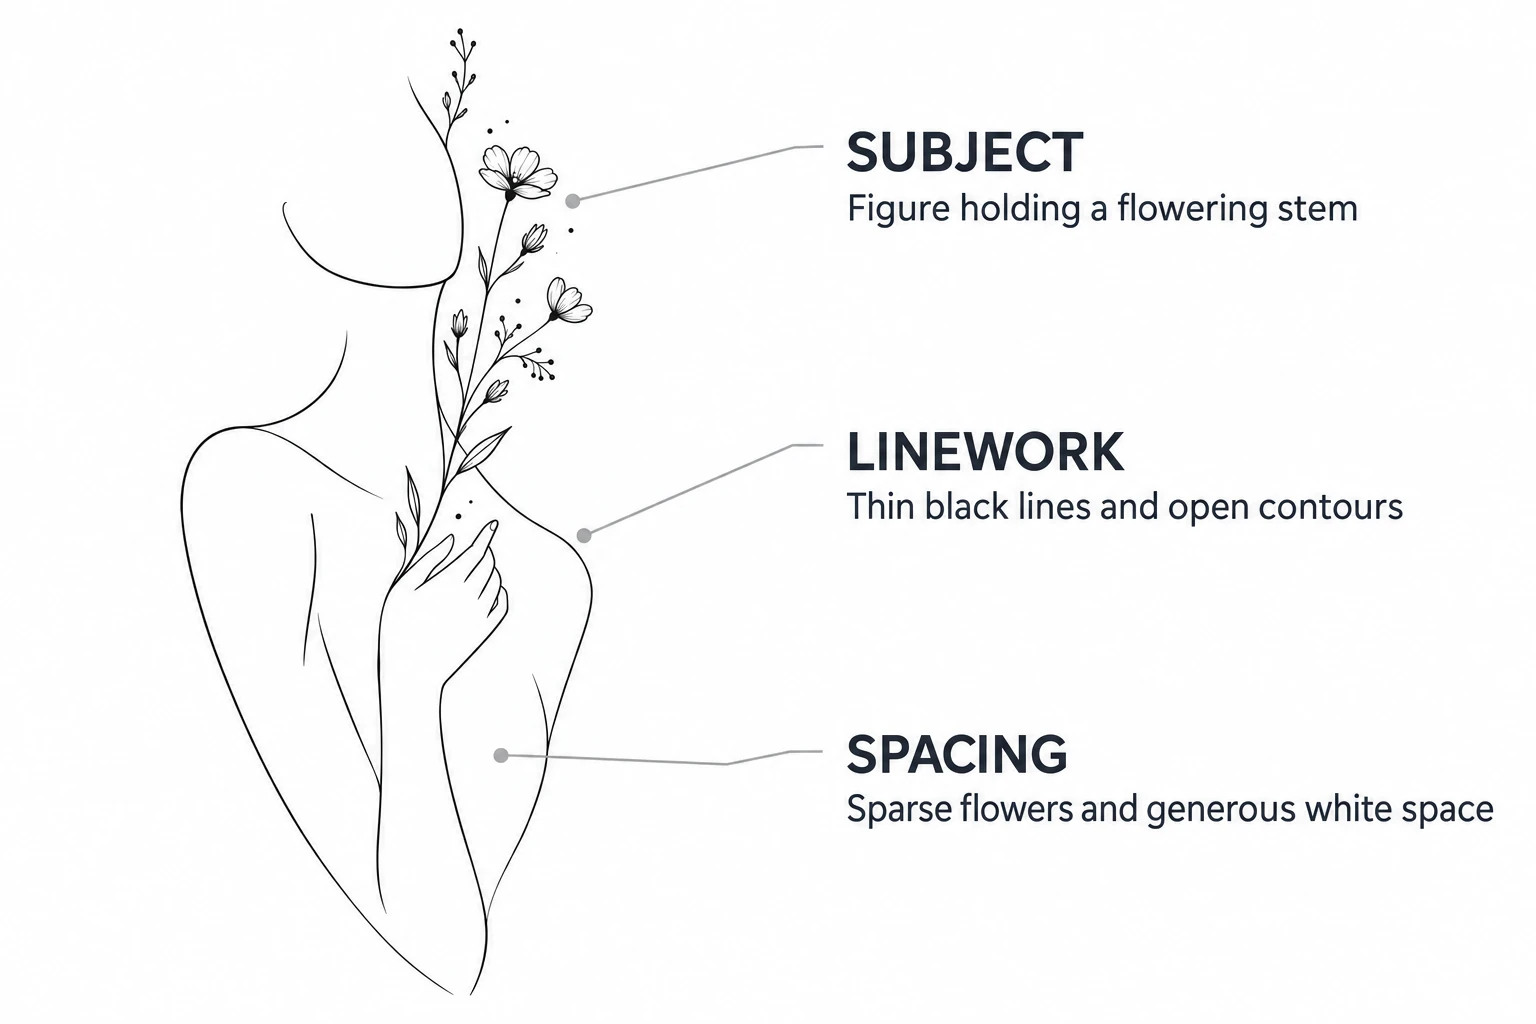
In TatSketch's AI tattoo generator, enter your description and choose a style that matches your references. For this example, choose Fine line. A possible prompt is:
A fine-line upper-body figure holding a tall flowering stem. Use an open, simplified face outline, a gently curved neck and shoulders, and a bent arm leading to the hand. Keep the flowers and leaves sparse, with black linework and generous white space. No lettering or background scene.
Adapt the subject, pose, and exclusions to match your own brief.
Choose a canvas shape that suits the arrangement. A vertical canvas makes sense for exploring this tall composition; the image's aspect ratio does not establish its physical tattoo size. Review the generation cost before submitting and save any useful result.
If you want more background on what these tools produce, our guide to AI tattoo generators and their limitations explains how a generated concept differs from a finished tattoo design.
6. Review your tattoo design and revise it
Compare the concept with your original notes before adding more detail. Look at the whole image first, then inspect connections and small features.
| Check | In the figure-and-flowers example |
|---|---|
| Main idea | Can you recognize a person holding flowers? |
| Connections | Does the hand actually meet the stem? |
| Spacing | Are blooms and leaves separated clearly? |
| Unwanted additions | Did lettering, borders, or extra objects appear? |
| Placement | Which elements might be hidden when the design wraps? |
Turn each problem into a specific request. Instead of "make it better," write "reduce the secondary flowers so the stem is easier to follow" or "move the hand so its grip is clear."
Keep a copy of the version you liked and a note about what should stay. If you are drawing, try the change on tracing paper or a separate digital layer. If you are using TatSketch, regenerating creates a new image and uses your available free allowance or credits; it does not preserve every other detail as a precise local edit would.
Leave questions about suitable line weight, detail at the intended size, and how the tattoo may age for your artist. A clear screen image helps explain an idea, but it does not settle those decisions.
7. Turn your concept into a brief for your tattoo artist
Find an artist whose portfolio includes work you like in the relevant style. Ask about their design and review process before booking, including when you can see the drawing and how revisions work.
Send a concise brief alongside your selected references:
Main idea: An upper-body figure holding a tall flowering stem.
Style: Fine black linework, a simplified face, and sparse flowers.
Proposed placement: Outer upper arm; final dimensions to discuss.
Keep: The hand-and-stem connection and open space around the figure.
Flexible: Flower species, pose, and the balance of the composition.
Leave out: Lettering, decorative borders, and background scenery.
Questions: What size suits this detail? What should change for this placement?
Label any AI-generated references and check the studio's policy before sending them. Authentink's published AI policy, for example, welcomes them as consultation material but says its artists draw the tattoo designs themselves. Ask your chosen artist what reference material they would find useful.
When reviewing the artist's proposal, return to your essential requirements and explain any mismatch. Ask for placement and scale to be checked on your body before proceeding. The useful outcome of this process is a design direction you can explain clearly, with room for the artist to resolve the final drawing.